Red Velvet Cheesecakes
I have been looking forward to this week of baking for a while because I am making one of my favourites...red velvet cheesecakes! Again, I searched for a recipe on Pinterest and found one that I thought looked delicious and slightly more challenging than last weeks baking. This recipe was divided into two parts: the red velvet cake layer and the cheesecake layer on top. In this post I will share with you my experience making these cheesecakes as well as little tips and tricks that I discovered along the way.
Ingredients: Red Velvet Cake Layer
1 and 1/2 cups + 1 tablespoon flour
1/4 cup cocoa powder
1 teaspoon baking soda
1/4 teaspoon salt
1/2 cup unsalted butter (room temperature)
3/4 cup packed brown sugar
1/4 cup granulated sugar
1 egg (room temperature)
1 tablespoon milk
2 teaspoons vanilla extract
1 tablespoon red food colouring
Instructions: Red Velvet Cake Layer
1. Preheat oven to 350.
2. Line 2 muffin pans with cupcake liners.
3. In a large bowl, whisk together the flour, cocoa powder, baking soda, and salt.
4. Using a mixer, beat the butter on high speed until creamy.
5. On medium speed, add in the brown sugar and granulated sugar mixing until combined.
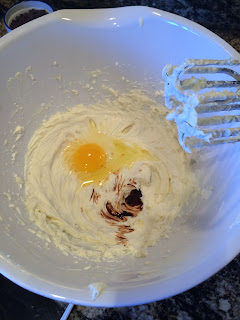
6. Beat in the egg, milk, and vanilla extract.
7. Add in the food colouring and beat until combined.
8. Combine your dry ingredients with your wet ingredients mixing until a soft and sticky dough is formed.
9. Press one tablespoon of cake dough into the bottom of each cupcake liner. (Tip: divide your dough between each cupcake liner before pressing into the bottom to make sure you have enough dough for each cupcake)
10. Bake for 8 minutes then remove from oven.
Ingredients: Cheesecake Layer
336g cream cheese (room temperature)
2 tablespoons plain greek yogurt
1/3 cup granulated sugar
1 egg (room temperature)
1 teaspoon vanilla extract
1/2 cup mini semi-sweet chocolate chips
Instructions: Cheesecake Layer
1. Using a mixer, beat the cream cheese on high until smooth.
2. Beat in the yogurt and sugar until combined.
3. Add in the egg and vanilla beating until combined. (Tip: over-beating the batter can lead to cracks in the cheesecake when it bakes)
4. Using a spatula fold in the chocolate chips.
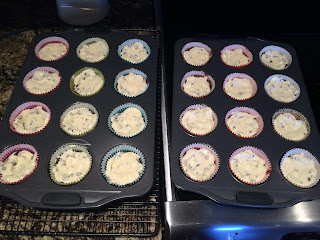
5. Put one teaspoon of cheesecake batter on top of the pre-baked red velvet cheesecake layer. Spread the cheesecake so that it covers the cake layer completely.
6. Bake the cheesecakes for about 20 minutes. You will know they are ready when they no longer jiggle when you shake the pan.
7. Let the cheesecakes cool at room temperature for 30 minutes, then place them in the refrigerator to cool for an additional 1 hour 30 minutes and ENJOY!
Results
I was nervous to make these cheesecakes because they are the most difficult thing I have had to bake so far. I think that they ended up turning out pretty good though! Throughout this baking experience, I learned a lot of little tips and tricks that it will be important for me to remember next time I make these cheesecakes.
Firstly, when beating the dough I used my regular mixing attachments. It would have been much more effective to use the dough mixing attachments to mix the batter. Using the regular attachments was very difficult as the thick dough kept getting stuck in them and they were very difficult to scrape off. The dough handle attachments would have allowed for smooth mixing without the dough bunching up in the centre.
 |
| Dough Mixing Handles |
 |
| Regular Mixing Handles |
Secondly, I discovered that cheesecakes can be quite temperamental to bake. The time is simply a gauge and should not be followed directly otherwise you may over bake your cheesecakes. My cheesecakes were only in the oven for 15 minutes before they were ready as opposed to the 20 minutes suggested in the recipe I followed. It is important when baking cheesecakes to check in frequently to see if they are still jiggly.
The third trick I discovered through reading the recipe was that over-beating the cheesecake batter can lead to cheesecake cracks. Although these cracks do not effect the taste, your cheesecakes will not look as appealing. I was unsure of how much mixing was too much so I stopped as soon as all my ingredients were combined. Thankfully, it appears that I did not over-beat my batter as there were no cracks in the tops of my cheesecakes.
Taste wise, the red velvet cheesecakes turned out pretty well. I liked the cheesecake layer much more than the red velvet cake layer. The cheesecake was fluffy, smooth, and tasted just as I had imagined it would. However, the red velvet layer was firmer than I would hav
e liked and looked more like chocolate cake than red velvet in colour. In the future I will follow the tips above and try a different red velvet layer recipe and I'm sure that they will lead to even better tasting red velvet cheesecakes!!


No comments:
Post a Comment